Chapter 1: Introduction
Chapter 2: Annual catches and overview
Chapter 3: Actual fishing method
Chapter 4: Attention to equipment
Chapter 5: The ecology of Kokanee in my home lake (Lake Numazawa, Fukushima Prefecture)
Chapter 6: Enjoying Kokanee
Chapter 7: Conclusion
Chapter 4: My Equipment
Section 1: Kayak and Basic Rigging
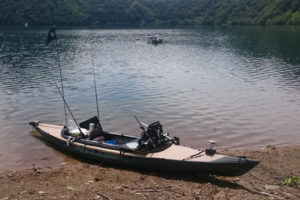
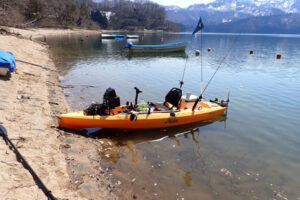
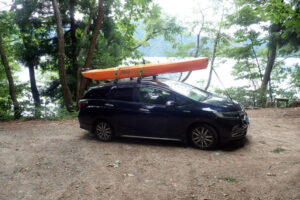
 The Kayak Itself
I initially bought a two-person, collapsible kayak called the “Alpina 2” from Fuji Canoe. I built a custom table to mount my rod, fish finder, and transducer. However, because the transducer was mounted on the side, it interfered with propulsion and was very tiring to paddle.
A major advantage of this model was its light weight and maneuverability. If I started to lose a school of kokanee, I could make a quick turn and relocate it easily.
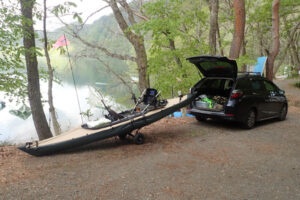
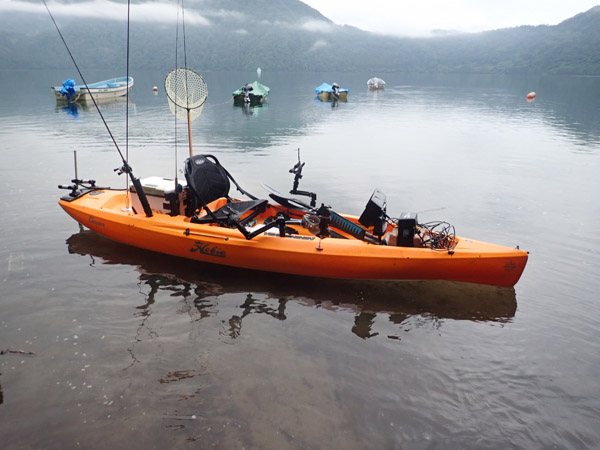 My next purchase was a pedal-drive kayak, the “Compass” from Hobie Kayak. Hobie is one of the oldest manufacturers of pedal-drive kayaks, and their system uses a fin-shaped rudder for propulsion. The biggest benefit was having both hands free. The propulsion was also much stronger than a paddle-powered kayak, and it was far less tiring.
However, pedal-drive kayaks have a wider turning radius than paddle-powered ones, so I have to compensate for that with speed.
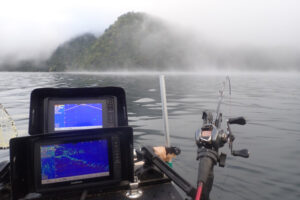
Fish Finder, Transducer, and Mounting
 There’s a convenient hole in the front of the kayak where I’ve attached a custom bar with a plate on it. I then mount the fish finder’s bail mount onto that, and the fish finder is ready to go.
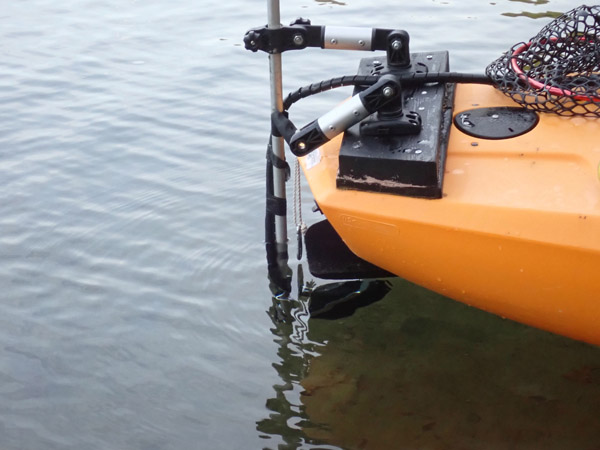
 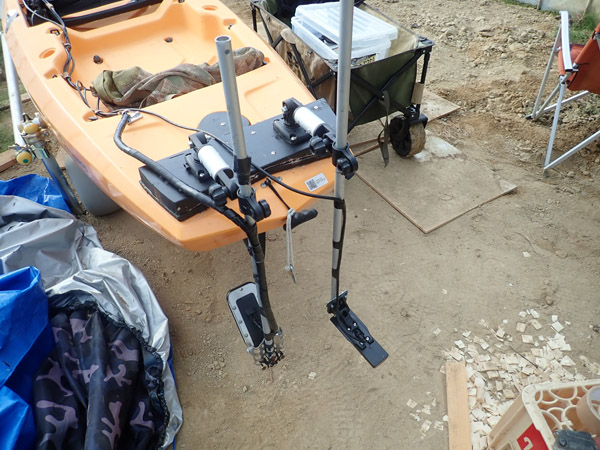 To minimize the impact on propulsion, I’ve mounted the transducer on the stern. Since it can’t be mounted directly, I’ve attached a plate to match the hull’s shape and secured an arm-type mount to it for the transducer.
Battery Mounting
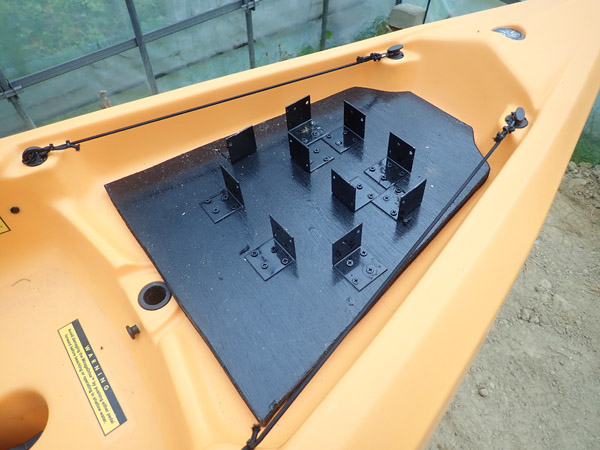 I need two batteries (18V, 20Ah) in total—one for the fish finder and one for the transducer. I built a custom plate to match the hull’s shape and secured the batteries to it.
Rod Holder and Cooler Box
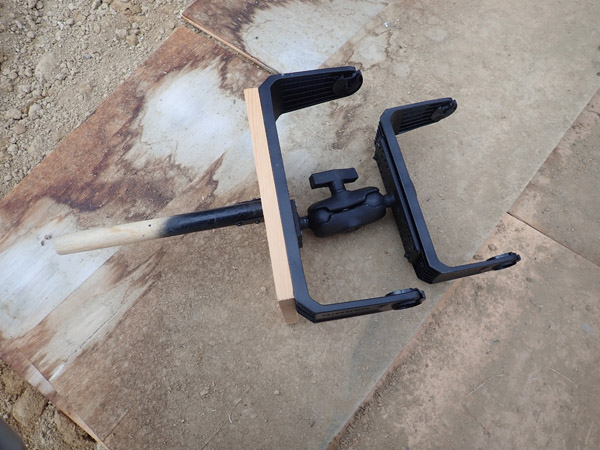
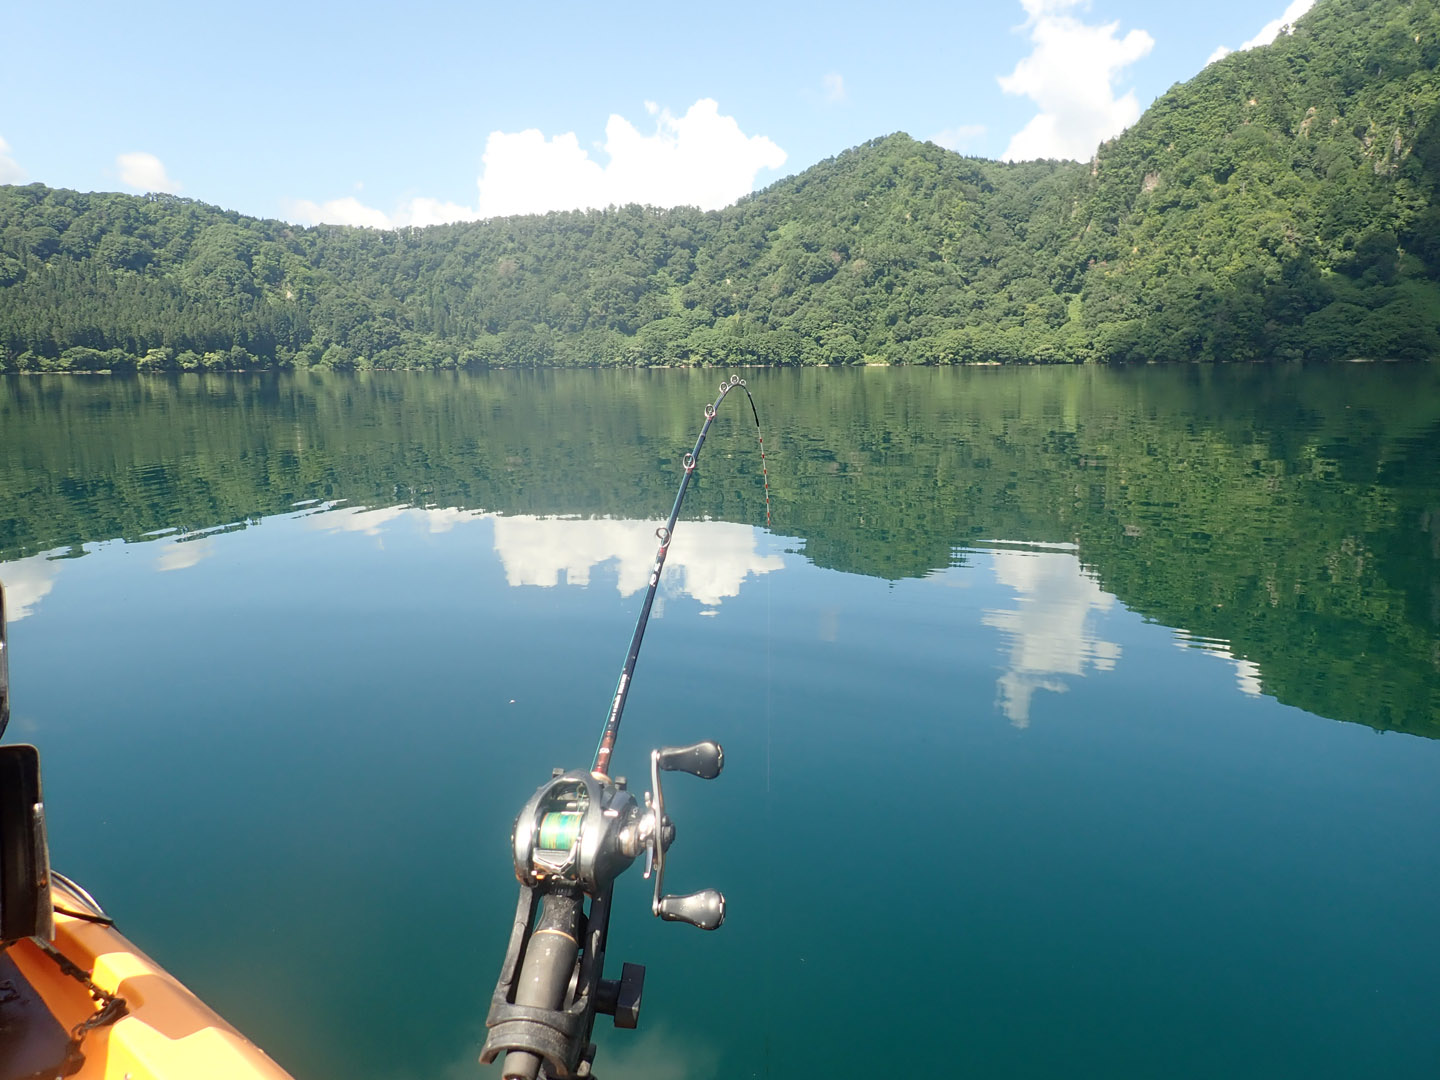
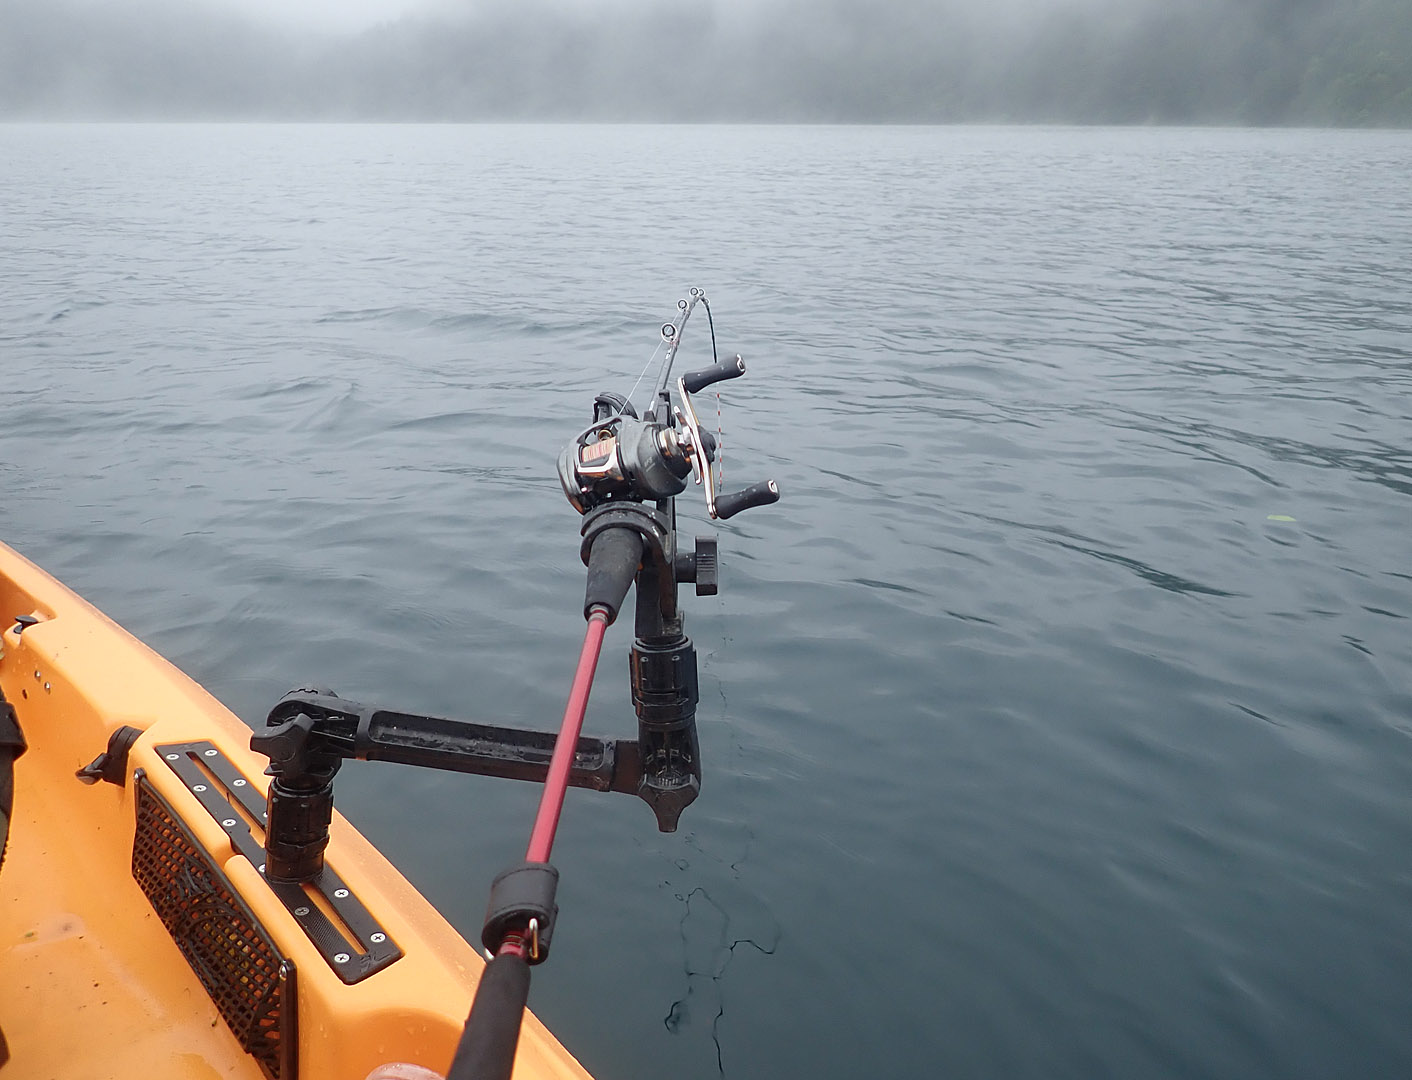 This kayak model comes standard with rails on both sides for mounting accessories. I screw a rod holder base into these rails and attach the rod holder. For kokanee fishing, I use a shorter rod and simply drop the rig straight down, so I don’t use an extension arm.
There’s a wide, flat space behind the seat where I place an 18-liter cooler box. There’s plenty of room, so you could fit an even larger cooler.
Section 2: Fish Finder and Transducer
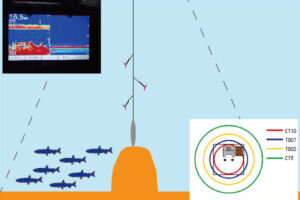
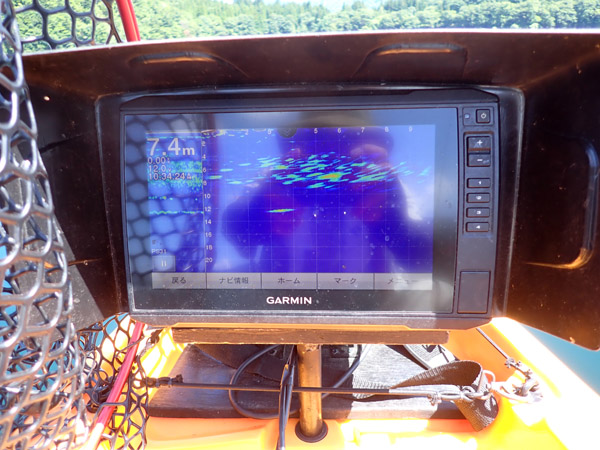 I use a Garmin “Echomap Plus 95SV” fish finder. In terms of visibility, this screen size is the minimum for me; I’d prefer a 10-inch model or larger. The current successor is the “Echomap UHD2 92SV,” and while there are higher-end models, I feel this series offers the best balance.
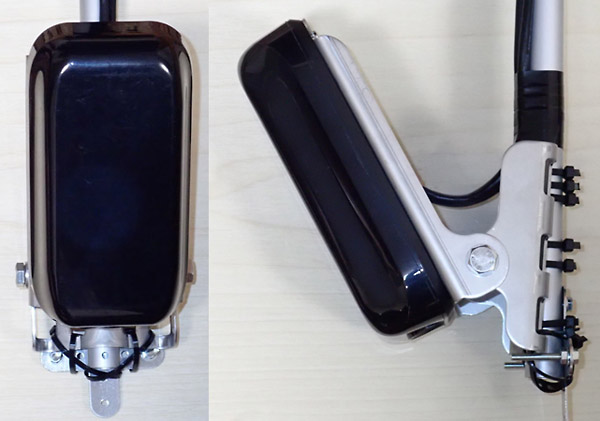
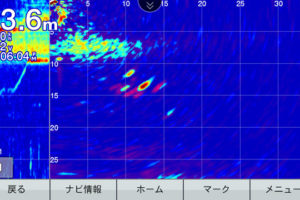
For the transducer, I use the Garmin “Panoptix PS31.” This forward-looking sonar is the core of this fishing method, capable of detecting a real-time view of what’s in front of the kayak up to about 60 meters. Garmin was the first to commercialize this kind of real-time sonar, and it has since been succeeded by newer versions of their “LiveScope” technology.
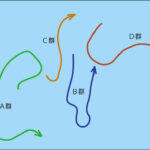
 I constantly adjust the forward distance and depth based on the location of the schools. The transducer, mounted at the stern, is positioned perfectly to show the rig as I drop it in front of the kayak. It’s fascinating to be able to watch the fish bite the rig and then jump out of the water.
Section 3: Rod and Reel
 I initially used a lightweight, 8:2 action flounder rod, but it was too stiff to handle the kokanee’s fight, causing me to lose a lot of fish. I switched to a lighter, 6:4 action rod, the Daiwa “Analsiter Light Game 64 S-190・Y.” It performs extremely well even after a fish is hooked, so I now use it as my main rod.
For the reel, I first used a small boat reel, the “Calcutta Conquest F300,” but I switched to a “Shimano Aldebaran BFS” to further reduce weight. This significantly lightened the load for handheld use and is perfect for the confined space of a kayak.
Section 4: The Rig
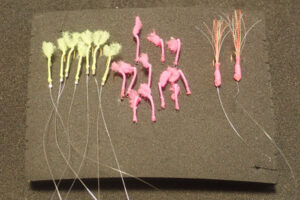
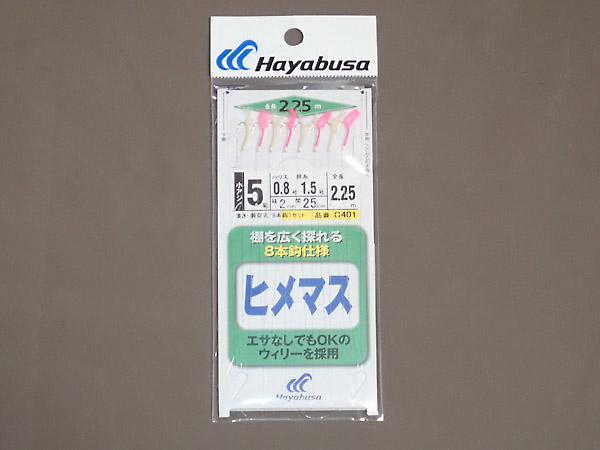 I initially used Hayabusa’s “Kokanee Willie 4-go, 8-hook” rig, but since it was discontinued, I decided to make my own. Using horse mackerel hooks and pink markers for stream fishing, I initially made a single 6-hook rig.
Later, I learned that adding a small metal plate could increase catches, so I added one to my design. To prevent the leader from being cut, I settled on a setup where I connect two rigs together.
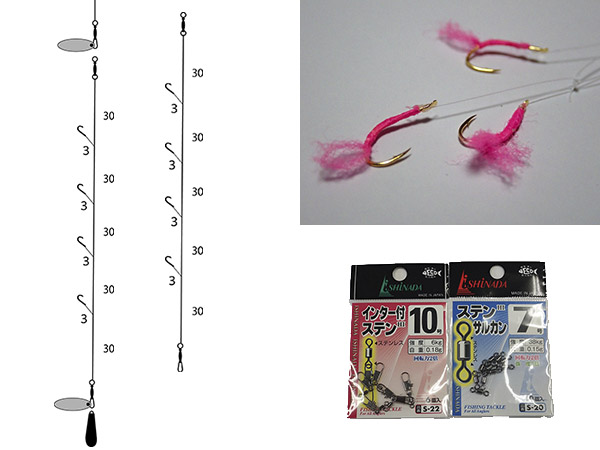 My current rig consists of four size 5 horse mackerel hooks (with pink markers), a size 1 leader, and a size 2 main line. I’ve also attached a small metal plate at the top.
I’ve consistently used a size 30 sinker. I chose the teardrop-shaped Daiwa “Dragon Sinker” for its easy handling and fast sinking speed. To avoid startling the kokanee, I’ve also painted the sinker black.
Section 5: Other Baits and Attractants
While I primarily use sabiki rigs for this type of fishing, I have hit slumps and tried other baits and attractants.
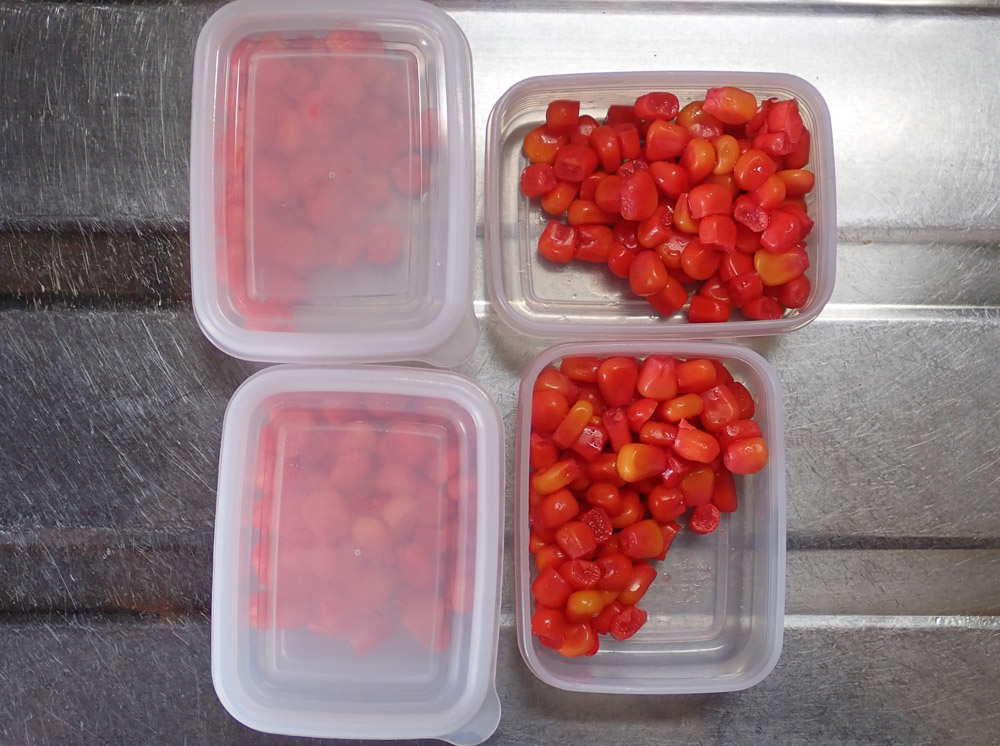 I’ve tested various baits, including maggots (red worms) which are also used in North America, corn, shrimp pieces, and worm-shaped plastics. In my experience, none of them got any bites except for the maggots, and even those were only about as effective as the Willie rig.
 I also tried liquid and spray-type kokanee attractants sold in North America. They seem to be primarily made from tuna extract. My impression was that they didn’t lead to any dramatic results; they were more like a placebo—better than nothing, but not a game-changer.
These experiences have reaffirmed my belief that the most effective way to improve your catch is to focus on the timing and technique of your Willie rig presentation. A faithful, fundamental approach is the most reliable.
Chapter 1: Introduction
Chapter 2: Annual catches and overview
Chapter 3: Actual fishing method
Chapter 4: Attention to equipment
Chapter 5: The ecology of Kokanee in my home lake (Lake Numazawa, Fukushima Prefecture)
Chapter 6: Enjoying Kokanee
Chapter 7: Conclusion
コメントを残す